

I bought my first laser engraver about three years ago, and for the first week I worried about all the wrong things. I worried about the software, about burn settings on maple versus walnut, about whether the exhaust fan was pulling enough to keep the smell of scorched wood out of the house and out of Carol's kitchen. What I did not worry about was my eyes. It took one close call on a slate coaster, a reflection off a curved edge and a second of leaning in to watch a line come out straight, to fix that permanently.
The pair that lives on my bench now is the FreeMascot OD 4+ laser safety glasses. They are rated OD 4+ across a 190 to 550 nanometer window, which covers the wavelengths most hobby diode lasers actually fire: 405, 445, 450, 520 and 532 nanometers. My machine runs a 450 nanometer blue diode module, so that window is the one that matters in my garage. What follows is the routine I settled into after the coaster incident, in the order I would do it if I were starting from scratch tomorrow.
The pair on my bench, not the pair in the drawer
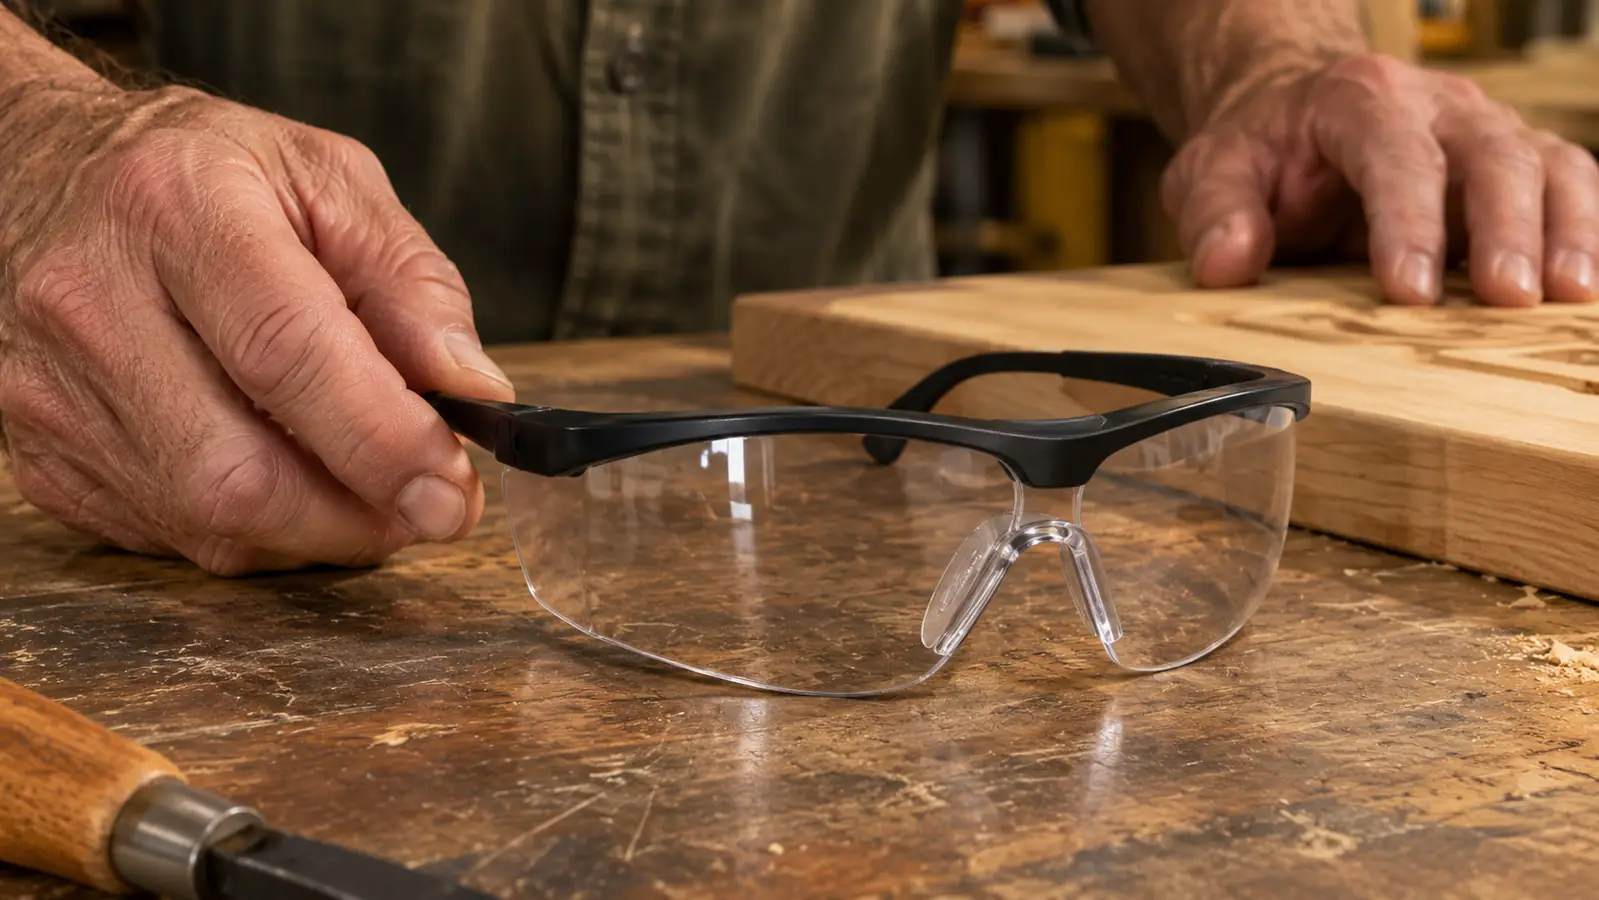
FreeMascot OD 4+ covers 190nm to 550nm, the range my 450nm diode module lives in. Anti-fog coated polycarbonate, full rim frame, light enough at 3.53 ounces that I forget I have them on.
Amazon Check Today's Price on Amazon →The Routine I Use on Every Job
Step 1: Read the wavelength off your laser before you buy any glasses
Every laser module has a wavelength, and it is usually printed on the module housing, stamped on the driver board, or buried in the manual under specifications. A blue diode module is commonly 445 or 450 nanometers. Violet modules are often 405. Green ones show up around 520 or 532. Write that number down and keep it with your order notes, because it is the single fact that decides whether a pair of safety glasses is correct or is just a dark piece of plastic on your face.
This is the part most beginners skip, and I understand why. The listings all look similar, the lenses all look dark, and it feels like a solved problem. Safety glasses are not sunglasses. A lens that blocks the wrong band of light will look perfectly serious and do nothing for the beam in front of you. The FreeMascot pair is built around that 190 to 550 nanometer window, and inside the window the rating is OD 4+, which means the lens cuts transmitted light at those wavelengths by four orders of magnitude.
Outside the window, though, they are just polycarbonate. If you ever move up to a CO2 laser firing at 10,600 nanometers, or a fiber module at 1,064, this is not the right pair and no amount of wearing it will change that. I say it plainly because I would rather you leave the wrong glasses in the drawer than trust them. Match the window to the machine first. Comfort, fit and price all come after that, and none of them matter if the number is wrong.
Step 2: Fit them properly the day they arrive, before the first cut
The frame on these is full rim and plastic, with polycarbonate lenses, and the listing puts the glasses at 6.2 by 5.6 by 2.2 inches and 3.53 ounces. In practice that means they sit on your face like a decent pair of shop glasses rather than something from a chemistry lab, which matters more than it sounds. Glasses that pinch get taken off. Glasses that slide down your nose get pushed up with a gloved hand and end up sitting on the bench for the rest of the job.
Put them on and look at your bench, not at the mirror. You should be able to see the workpiece, the ruler, and the focus point without ducking your head or tilting the frame. These run at 30 percent visible light transmission, so the room dims without going black. I can read the grain and the layout lines on a cutting board with mine on. The lenses carry an anti-fog coating, and it works, but treat it gently: breathe on them once, wipe with a soft cloth, and let them settle instead of scrubbing at them every thirty seconds.
One honest note about fit. They are listed as a standard fit, and if you try to wear prescription glasses underneath you will feel pressure at the temples before the first pass is done. I gave it a week and quit. I wear the safety glasses alone now and keep my readers on a lanyard around my neck, which is a slower way to work and a safer one. If your prescription is strong enough that you cannot find the workpiece without it, consider prescription inserts rather than stacking two frames.
Step 3: Build the bench so the glasses are the last line and not the only one
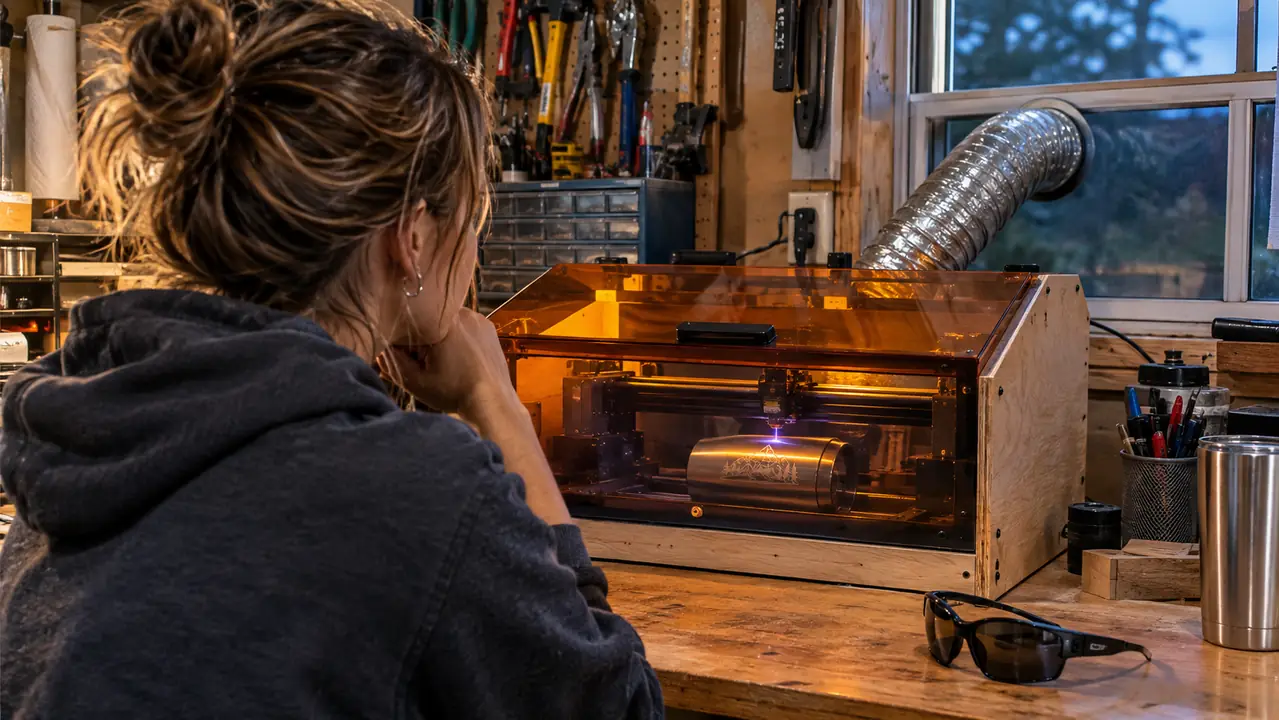
Safety glasses are a backup, not a plan. On my setup the engraver sits inside a small enclosure I built from scrap plywood, with the front panel closed during a run. It vents out the window behind the bench through a dryer duct, and the shop vac handles the dust on the slats. That enclosure is doing most of the work. The glasses are there to catch what the enclosure misses, and the misses are the part you cannot predict.
The misses come off shiny stock. Stainless tumblers and slate coasters are the two worst things I run, because a curved reflective surface can throw light sideways instead of absorbing it into the material. Never lean over the machine while it is running to watch a line come out straight. I learned that on a tumbler and I have not done it since. Watch from an angle with your head back, or set your phone on a small tripod and watch the screen from a step away.
Keep the pair by the machine, not on a hook by the door. Mine sits on the corner of the bench next to the focus tool, close enough that putting them on is part of opening the lid. If the glasses live across the garage, they will not get worn on the short jobs, and the short jobs are exactly the ones you do without thinking about them. Position beats intention every time in a workshop.
Step 4: Make it a rule that survives the boring jobs
A safety habit is only as good as its weakest evening. The evening that goes wrong is the one where you are running forty leather keychains before a Saturday church bazaar and you have already done the setup nine times. That is when you tap the lid down without reaching for the glasses, because it is one small pass and you are only watching for a second. One small pass is still a laser running.
My rule is short and it does not bend. Glasses go on before the lid opens, and come off after the job finishes and the machine stops moving. Not after the outline. Not after this one last pass. The whole run. Carol knows it too, and if she comes out to the garage for something she waits at the door until the job stops. That is not paranoia in a one-car garage with no second exit on that side. It is one less thing to renegotiate at nine at night when you are tired.
I run maybe three evenings a week and most of a Saturday, which is a hobby schedule, not a factory floor. But the routine is what carries you when you are tired, and the routine only holds if the gear is tolerable. The FreeMascot pair is comfortable enough that a two hour run does not leave me with a headache or red marks across the bridge of my nose, and honestly that is the reason the habit stuck. A pair that hurt would have been back in the drawer by the second week.
Step 5: Clean them properly and retire them when the coating goes
Polycarbonate scratches, and the anti-fog coating is the fragile part. A dirty lens and a scratched lens push you toward the same bad decision, which is taking them off mid-job to see better. Rinse under lukewarm water, use a drop of dish soap, dry with a soft cloth. No paper towel, no shop rag with sawdust worked into it, and no solvent of any kind near the coating.
Store them closed up. Mine goes into a soft pouch in the top drawer of the bench, which keeps the dust off and keeps them off the concrete floor where I would eventually step on them. Every couple of months, hold the lenses up to a lamp and look through them. Cloudy patches in the center of the lens, or the anti-fog film starting to flake at the edges, means replacement. Not another few weeks.
Keep one pair tied to one machine. If you ever add a second laser with a different wavelength, recheck the window before you assume the old pair covers it. That is the quiet way people get hurt in a home shop: an inherited pair of glasses, a new machine, and nobody ever checked the number on the side of the module. The rating is only meaningful against a specific wavelength, so treat it that way.
What Else Helps
Ventilation does more for you in that garage than any other single item. I run an inline fan on the exhaust duct and crack the window on the opposite wall so there is makeup air coming in. After a two hour run the smell should be close to nothing. If you can smell scorched wood in the kitchen, the vent is not doing its job and you are standing in the exhaust plume with your glasses on, which is safe for your eyes and not much else.
A camera on the workbed and your phone screen beside it are worth the ten minutes of setup, for two reasons. You stop leaning in to watch, and you catch a bad layout before it burns itself into a cutting board you already sanded twice. A strip of tape on the floor marking where your toes stop is also underrated. So is a written checklist taped to the wall with five lines on it: glasses on, vent on, lid closed, phone recording, hands clear.
The last one is a habit rather than a piece of gear. Tell the people you live with what a running job looks like and ask them not to come in mid-pass. Carol waits at the door now, and it took one conversation. That single rule has done more for safety in my garage than any upgrade I have bought, and it cost me nothing but a minute of explaining.
OD 4+ from 190 to 550 nanometers is the entire point of the pair. If your laser fires outside that window, these are the wrong glasses no matter how well they fit.
Thirty percent light transmission, a full rim frame, and a window sized for a diode shop
If your module runs anywhere in the 405 to 532 nanometer range, this is the pair I would start with. Check your wavelength first. Fit them before the first job, not during it.
Amazon Check Today's Price on Amazon →